Self Leveling Concrete
Flooring Expert & Author
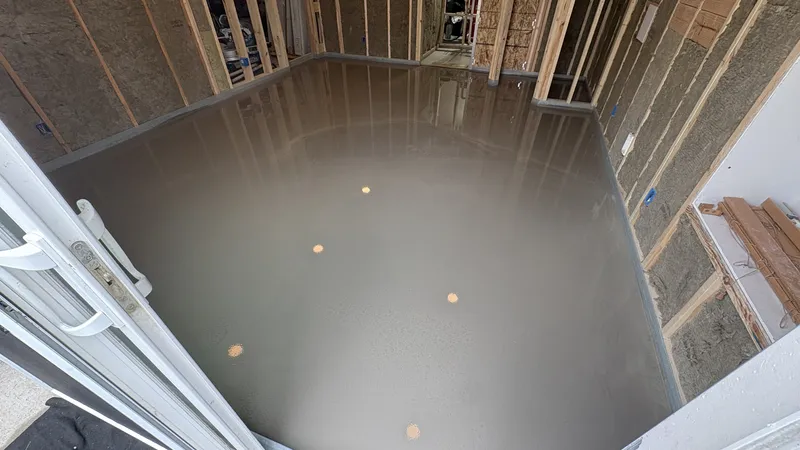
Self leveling concrete (also sold as self-leveling compound, cement or underlayment) is one idea under several names: a pourable mix that flows out to a flat surface and fills the low spots in a floor before new flooring goes on. For floors inside a home, the product is usually sold as a self-leveling underlayment or compound. The sections below explain how it works, how to tell whether your floor needs it, how to estimate a pour, and when the job is better left to a professional.
What is self leveling concrete?
Self leveling concrete is a flowable, cement-based mix that is poured onto a floor, spreads under its own weight and settles into a flat, smooth layer. It is used to correct dips, slopes and uneven patches, not to build structure. It goes under flooring such as luxury vinyl plank (LVP), laminate, tile or hardwood, and it is not a replacement for a sound subfloor.
Concrete, compound, cement or underlayment: what is the difference?
The names overlap, and manufacturers use them loosely. In practice:
- **Self-leveling underlayment** and **self-leveling compound** are the usual labels for interior floor products meant to sit under finished flooring.
- **Self-leveling concrete** and **self-leveling cement** are the terms most people search for. They often mean the same interior products, but some products labeled this way are made for thicker pours or exterior use.
- The label and the manufacturer's data sheet matter more than the name. They state the allowed thickness, the surfaces it can go over, the primer to use, and whether it is made for indoor or outdoor use.
If you are planning an outdoor pour, use only a product labeled for exterior use and follow its instructions.
How to tell whether your floor needs leveling
Flooring manufacturers set limits on how flat a subfloor must be. Flooret, which makes LVP and laminate, lists 3/16 inch over 10 feet for most of its products, and a tighter limit for its herringbone LVP. The test it describes is simple: lay a 10-foot straightedge on the floor, and the gap underneath should stay at or under 3/16 inch at any point. It also suggests checking in several directions and marking the problem areas before laying planks. Your product's own installation guide sets the number for your floor, so check it before you start.
Signs the floor is likely out of tolerance include visible dips or a slope, planks that flex or separate at the seams, and squeaks or soft spots that point to a subfloor problem. Flatness matters most for floating floors like LVP and laminate, which lock together and depend on a flat surface to stay joined.
When self-leveling is the right fix
Flooret's guidance for low spots is to fill them with a Portland cement-based patching compound or a self-leveling compound, trowel it smooth, and let it cure fully before installing. High spots should be sanded or ground down, not covered with underlayment.
In plain terms: a few small low spots can usually be patched, and high spots need grinding. When the unevenness is widespread, a self-leveling pour is the more practical fix, because it flattens the whole area at once.
How self-leveling is installed
Each product has its own steps, so the manufacturer's instructions always govern. The general order is:
- Inspect and measure the floor, and mark the high and low spots.
- Clean the surface and repair cracks, holes and loose areas. Grind down high spots.
- Seal the edges, gaps and drains so the mix cannot run out.
- Prime the surface with the primer the manufacturer specifies.
- Mix to the stated water ratio, pour, and spread it so it flows into the low areas.
- Let it cure for the time stated, and check that it is flat before flooring is installed.
Working time is short once the mix is wet, so the pour is usually done in one continuous pass. Temperature matters too. Armstrong's guide for resilient flooring says the room, the flooring and the adhesives should be held at a minimum of 65°F for 48 hours before, during and after installation, and that the temperature should never fall below 55°F during the life of the floor. That is one manufacturer's guide for one product type, so follow the instructions for the products you use.
Can you self-level over a concrete slab or a wood subfloor?
Self-leveling is commonly used over concrete. Armstrong's guide says concrete substrates should be moisture tested, using either a moisture vapor emission rate (MVER) test or an in-situ relative humidity probe, before resilient flooring is installed. In a basement or any slab-on-grade room, moisture testing comes before leveling and flooring.
Over a wood subfloor it depends on the product and on the condition of the wood. The subfloor has to be solid, secured and properly primed first, and some products require reinforcement such as metal lath. If the wood is damaged, soft or water-stained, repairing or replacing it comes before any leveling. Always check the data sheet for the product you plan to use.
How to estimate how much you need
The math is the same for every product: area times average depth gives volume. For example, a 200 square foot room that needs an average of 1/4 inch of material needs 200 x (0.25 / 12) = about 4.2 cubic feet of mixed material. How much one bag makes at a given depth is printed on the bag and on the product's data sheet. Divide your volume by that figure to get the number of bags.
Treat that number as a minimum. Floors are rarely perfectly flat, so deeper low spots take more material, and the mix that stays in the bucket and the mixer is lost. A flooring contractor measures the actual depth with a straightedge and a level or laser, which gets closer than an online calculator.
What affects the cost
Cost depends on the size of the area, how deep the low spots are, whether the surface is concrete or wood, what repairs or grinding are needed first, and the product used. Because depth drives the amount of material, a floor with deep dips costs noticeably more than one with a shallow slope. A written estimate after an in-home look gives you a firm number for your floor.
DIY or hire a pro?
A small, shallow patch in a dry room is a reasonable DIY project if you follow the product instructions closely. A professional is the safer choice when:
- The area is large, or the low spots are deep.
- The subfloor is wood, or you suspect rot, loose panels or damaged joists.
- You are on a basement slab and moisture is a concern.
- You are installing floating flooring with a strict flatness requirement, or the floor will be warrantied.
- The pour has to be finished in one pass over a large room.
A bad pour is hard to undo: once the mix has cured, fixing it usually means grinding it off.
Next step
Illustrious Flooring handles floor leveling, self-leveling pours, subfloor repair and moisture control before new flooring goes down, and installs hardwood, LVP and laminate. Kyle Hedin is a Certified Flooring Installer (CFI #17580) through the International Certified Floorcovering Installers Association. Call (262) 683-5301, Monday to Friday, 9 AM to 5 PM, or request a free estimate and we will check your floor and tell you what it needs.
Sources
- How Flat Does My Subfloor Need to Be? - Flooret support page, flatness requirements and low-spot repair guidance.
- Luxury Vinyl Tile Installation System (glue-down) installation guide - Armstrong Flooring, PDF created March 25, 2021, temperature requirements and concrete moisture testing.
Kyle Hedin is the founder of Illustrious Flooring in Wales, Wisconsin, specializing in high-quality hardwood, LVP, and laminate flooring installations. With over 10 years of experience in the flooring industry, Kyle brings expert craftsmanship and a keen eye for detail to every project in Waukesha County and Southeast Wisconsin. His commitment to clear communication and client satisfaction sets Illustrious Flooring apart.
Related Flooring Services
Serving Waukesha, Brookfield, Oconomowoc, New Berlin, Menomonee Falls & SE Wisconsin.
Planning a Flooring Upgrade?
Get a clear, honest quote from Illustrious Flooring.