Shiplap Accent Wall: How It's Installed and When to Hire a Pro
Flooring Expert & Author
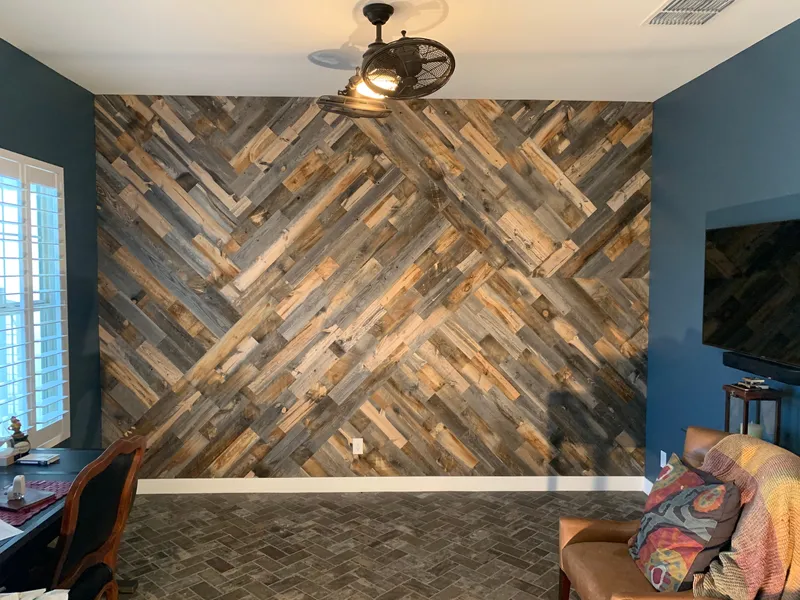
A shiplap accent wall is one wall covered in boards that interlock edge to edge, usually painted or stained to stand out from the rest of the room. The job comes down to a few steps: let the boards acclimate in the room, find the studs, set the first board perfectly level, then nail up the wall board by board, leaving small gaps for movement. A careful DIYer can do a simple wall. A tall, uneven or complicated wall is usually worth giving to a professional. This guide covers how shiplap is installed, what goes wrong in a Wisconsin home, and when it makes sense to hire help in Waukesha and Southeast Wisconsin.
What a shiplap accent wall is
Shiplap boards have rabbeted edges, which are notches cut along the sides so each board overlaps the next. Manufacturers' instruction sheets describe a long flange on top that the nails go through and a short flange below. Many walls use a small, even gap between boards, called a nickel gap, because a nickel is often used as the spacer while installing. The result is a clean, shadowed line between boards.
Horizontal or vertical?
Lowe's installation guide describes horizontal shiplap as the classic look and vertical shiplap as giving taller, cleaner lines. The choice changes the work. A shiplap manufacturer's instruction sheet says that when the boards run vertically, furring strips need to be added to the studs every 24 inches so the boards have something to nail into. Plan for that extra step if you want a vertical wall.
What you need
- **Tools:** tape measure, level, stud finder, pencil, saw (miter saw, circular saw or jigsaw), and a hammer or brad nailer. Lowe's recommends 16-gauge brad or finish nails, and the manufacturer sheet above uses 18-gauge, 1 3/4 inch brad nails, so follow the instructions that come with your boards.
- **Materials:** the boards, plus construction adhesive if the instructions call for it, wood filler for nail holes, and primer, paint or stain.
- **Extra boards:** Lowe's suggests buying about 10 percent more than your measurements, to cover cuts and mistakes.
How a shiplap accent wall is installed
1. **Acclimate the boards.** Lowe's says to let the boards sit in the room for 2 to 3 days. The manufacturer's sheet says 72 hours, stacked on 2 by 4s off the floor in the room where they will be installed, and not in a place with big swings in humidity.
2. **Prepare the wall.** Remove outlet covers, trim and baseboards, locate the studs with a stud finder and mark them, and clean the wall.
3. **Draw a level line.** Use a level or chalk line to mark where the first board goes, usually at the bottom of the wall so the rest stay straight.
4. **Set the first board.** Everything above depends on it. Lowe's says to place it 1/4 to 1/2 inch above the floor to allow for expansion, check it with a level and fasten it to the studs. The manufacturer's sheet starts in a corner with a 1/8 inch gap and sets the first board in construction adhesive.
5. **Add the next boards.** Slide each board into the one below it. Lowe's calls for nails every 12 to 16 inches into studs or blocking. The manufacturer's sheet nails through the top flange and leaves a 1/16 inch gap at end-to-end joints for expansion, using a nickel or a nail as a spacer. On long walls, stagger the end joints so they do not line up.
6. **Cut around outlets and at the top.** Measure and mark outlet openings and cut them with a drill and jigsaw. Cut the last row to fit under the ceiling and leave a small gap for movement.
7. **Finish.** Fill nail holes, sand lightly, then paint or seal the wall. Lowe's says most shiplap comes primed. Reinstall trim, baseboards and outlet covers.
Why Wisconsin winters matter for shiplap
Wood takes on and gives off moisture with the air around it. Daniel Cassens of Purdue University Extension explains that wood settles to a moisture content that matches the temperature and humidity of its room. At 70°F and 35 percent relative humidity, he gives that moisture content as 6.9 percent. In a heated house in winter, when humidity can drop to 20 percent or lower, it falls to 4.5 percent, and he notes that after a winter of heating, cracks can develop in wood floors and furniture joints can open. He also says the change takes time, from a few weeks to a month or more.
For a shiplap wall that means two things. Acclimation matters more in winter, because boards stored in a cold garage or a damp basement need time to adjust to a heated room. And small gaps at the floor, the ceiling and end joints are there on purpose. Manufacturers also say their boards will move a little: the sheet above notes that MDF shiplap, like other wood products, absorbs and releases moisture, so some expansion and contraction should be expected.
Common mistakes
- **Starting with an unlevel first board.** Floors are often not level, so level the board itself, not the floor.
- **Missing the studs.** Nails that miss framing hold poorly. Mark studs first, and ask whether adhesive is also called for.
- **No expansion gaps.** Tight boards that have no room to move can buckle or open up as humidity changes.
- **Skipping local rules.** The manufacturer's sheet says that when boards go directly on studs, local building and fire codes need to be checked.
Wood, MDF, laminate or LVP?
Shiplap is often sold as wood or MDF, and the wall itself can be built from other materials. Illustrious Flooring builds accent walls in wood, laminate and LVP, and helps customers choose by room, look and budget. Whatever you choose, follow the installation instructions for that product.
DIY or hire a pro?
In our experience, a short, square wall in a dry room with clear stud lines is a reasonable DIY project if you are comfortable with a level and a saw. We recommend hiring a professional when the wall is tall or runs up a stairwell, the ceiling or floor is noticeably uneven, the layout has many outlets, windows or corners, or you want a vertical pattern with furring strips. A pro also checks the framing and the wall before the first board goes up, which is where most problems start.
Shiplap accent walls in Waukesha, WI
Illustrious Flooring designs and installs accent walls for homeowners in Waukesha, Oconomowoc, Brookfield and across Southeast Wisconsin. Kyle Hedin is a Certified Flooring Installer (CFI #17580) through the International Certified Floorcovering Installers Association, and our work carries a 5-year workmanship warranty. Call (262) 683-5301, Monday to Friday, 9 AM to 5 PM, or request a free in-home estimate.
Questions about shiplap accent walls
Can you install shiplap directly on drywall?
Yes. One manufacturer's instructions say shiplap can go directly on drywall: mark the stud locations for nailing, or use construction adhesive. If you fasten directly to studs, check local building and fire codes.
How long should shiplap acclimate before installation?
Lowe's says 2 to 3 days in the room where it will be installed. One manufacturer says 72 hours. Follow the instructions for your product.
How much extra shiplap should I buy?
Lowe's suggests about 10 percent extra for cuts and mistakes.
What is a nickel gap?
A small, even gap between boards, set with a nickel or similar spacer while installing. It gives the wall its shadow lines.
Can shiplap be installed vertically?
Yes. Lowe's describes vertical shiplap as giving taller, cleaner lines. One manufacturer says to add furring strips to the studs every 24 inches for a vertical installation.
Sources
- Shiplap Installation Guide - Lowe's, shiplap installation instructions: acclimation, studs, first board, nailing, finishing.
- Shiplap Installation Instructions - Panel (Alpena, Michigan), manufacturer instruction sheet for shiplap.
- Controlling Moisture Content in Stored Lumber (FNR-403-W) - Daniel L. Cassens, Purdue University Cooperative Extension Service, equilibrium moisture content and seasonal wood movement.
Kyle Hedin is the founder of Illustrious Flooring in Wales, Wisconsin, specializing in high-quality hardwood, LVP, and laminate flooring installations. With over 10 years of experience in the flooring industry, Kyle brings expert craftsmanship and a keen eye for detail to every project in Waukesha County and Southeast Wisconsin. His commitment to clear communication and client satisfaction sets Illustrious Flooring apart.
Related Flooring Services
Serving Waukesha, Brookfield, Oconomowoc, New Berlin, Menomonee Falls & SE Wisconsin.
Planning a Flooring Upgrade?
Get a clear, honest quote from Illustrious Flooring.